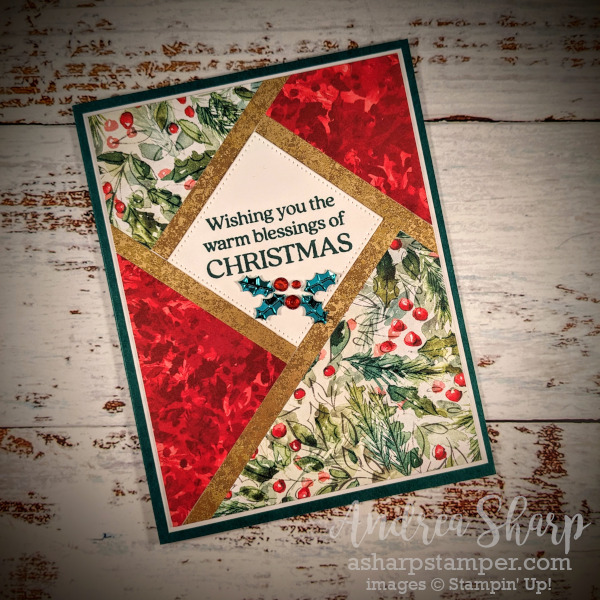
A couple months ago I started seeing lots of cards online that looked like this. This is one of the amazing things about the internet – we can gain new inspiration and ideas from others so quickly. I’m a little slow to the party and it took me a while to figure out what this design has been called so I could get some tips. Apparently this is called a “fractured card”, but the reason for the name isn’t obvious to me. There are a bunch of videos on YouTube that show different ways that people created their cards. The simplest has a single sheet of patterned paper or cardstock on the background with the center diamond attached and then strips built around it. Quick and easy! This didn’t work for me because I wanted to have 2 designs of patterned paper. I spent some time experimenting before I finally got something that worked for me. I’ll try to explain it here, and I hope it’s clear. I’ll warn you, my approach is a bit fiddly and requires precision. If this isn’t something that you like, then I encourage you to look for videos that show easier ways to do this.
- Stamp the greeting and diecut with a square from Stylish Shapes (I used the middle size)
- Cut cheap cardstcock 5 1/4″ x 4″
- On that cardstock, draw lines to create a focal point.
- Vertical line – 2″ (centered)
- Horizontal line – 2″ from the top
- Using those lines attach the diecut so the points align with the 4 lines drawn
- Attach 1/4″ strips around the square
- You will need 2-3 strips for this step
- It doesn’t matter where you start; align the end of the first piece with a point of the square and glue it down along the edge of the square.
- Trim off the excess, and square off the end of the strip
- For the remaining sides, align the end of the strip with the point and the previous strip. Glue it down along the edge of the square, and trim the excess
- Now that the sections are created with the strips it’s time to add in the patterned paper
- I used one 4″ x 2 3/4″ piece for the upper right and lower left.
- Start with upper right: put the corner of the paper to align with the edges of the strips
- Trim the excess paper
- Rotate the paper and use the same method to align with the edges of the strips on the bottom left
- Trim the excess paper
- For the upper left I used paper 2 3/4″ x 1 3/4″
- Adhere a corner of the paper with the edges of the strips in the upper left
- Trim the excess paper
- For the bottom right I used paper 4 1/2″ x 2 1/2″
- Adhere a corner of the paper with the edges of the strips in the bottom right
- Trim the excess paper
- I used one 4″ x 2 3/4″ piece for the upper right and lower left.
- For my card, I trimmed the finished panel on all 4 edges to a finished size of 5 1/8″ x 3 7/8″ so I could add the thin mat beneath it. You could totally skip this step.
- Glue all of that down on a cardstock base, embellish further (if you want) and you’re done!
I really like how this card looks and I’m sure that I’ll make more of these in the future. There is some waste of patterned paper which goes against my frugal nature, but it is sooo pretty that I can accept the waste. If you decide to try it, I encourage you to practice a few times with some old papers that you don’t care about to figure it out before you start cutting into papers that you love. We all have some of those old papers that we don’t really care about, but can’t quite bring ourselves to recycle. Experimentation is a perfect use for those papers!
If you give this a try, I would love to hear from you and see your creations!
Product List  |  | ||
 |
")
 Designer Series Paper")
 Specialty Paper")


