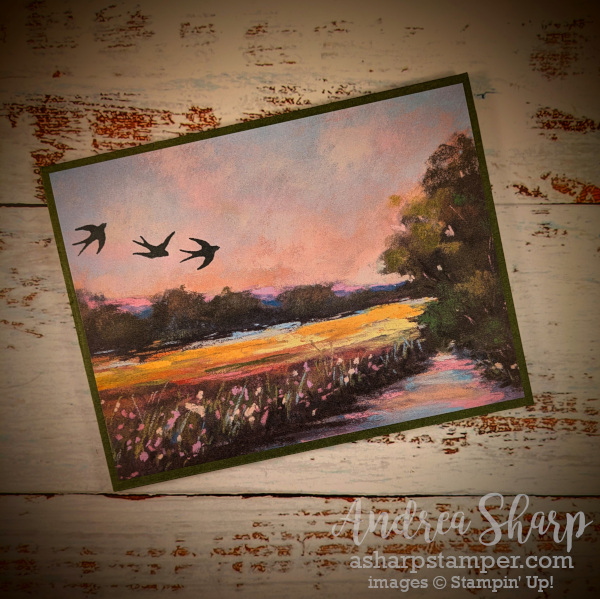
This is one of the cards that I created during an online event a few months ago. The leader used the Beautiful Gallery patterned paper for her card, and I pulled out the absolutely gorgeous Splendid Autumn paper for my creation. There are lots of beautiful, scenic papers that Stampin’ Up!™ has offered in the last few years, and any of them would be great for this card. The top layer is very basic – it’s a section of the patterned paper with some stamped birds. That’s it. And it is sooo pretty!!!

In addition to the beautiful paper on the front, this card has an interesting fold that makes it a unique card. This has a piece of Regals patterned paper to give some interesting pattern and color to the inside. A matted stamped greeting is all that adorns this layer. Again, it’s super-simple and the patterned paper adds so much.
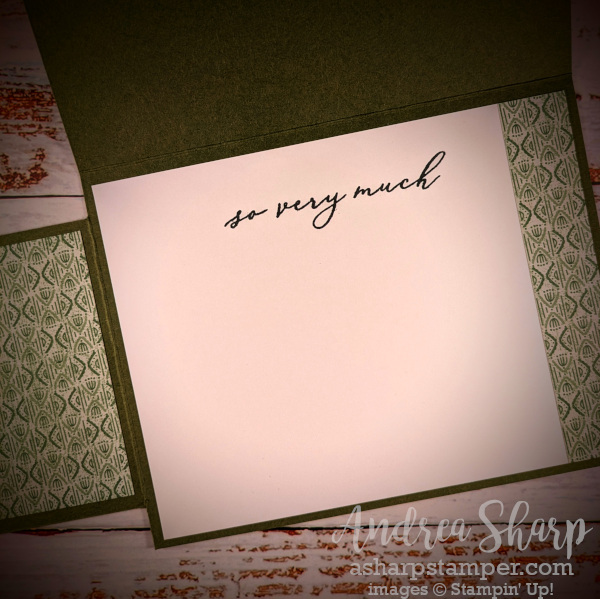
Lastly, this is the inside of the card. You can see the top layer open at the top, and the middle layer is opened on the left. I used some more of the same Regals patterned paper to adorn the back of the middle layer and the right edge of the stamped inside layer. I can’t emphasize enough how easy this card is to put together. I’ll share the cutting dimensions so you can try it out on your own.
Here are the cutting dimensions:
- Mossy Meadow (card base): 8 1/2″ x 11″, scored at 4 1/4″ and 5 1/2″
- Mossy Meadow (greeting mat): 3 1/2″ x 1″
- Splendid Autumn DSP (front panel): 4″ x 5 1/4″
- Regals DSP (inside panels): 5 1/4″ x 3″; 2 pieces
- Regals DSP (inside strip): 3/4″ x 4″
- Basic White (inside layer): 4″ x 5 1/4″
- Basic White (greeting on middle layer): 3 1/4″ x 3/4″
And here are the instructions to cut and assemble:
- The Mossy Meadow card base:
- Cut away the upper left 4 1/4″ x 5 1/2″ quadrant of the paper
- You are left with a piece of paper with 3 sections; one on the bottom left and two on the right
- In the bottom left 4 1/4″ x 5 1/2″ quadrant, cut 1/2″ along the 5 1/2″ score line from the bottom of the panel
- Cut along the score line 1/2″ down from the top along the 5 1/2″ score line
- Rotate the paper in your trimmer so that the bottom left 4 1/4″ x 5 1/2″ quadrant is at the top
- Cut away the 1/2″ strip along the right edge of this section; starting from the top and ending at the score line
- This will meet the cut that you made in step 3
- Slide the paper in your trimmer to the left edge of the quadrant is at the 1/2″ mark
- Cut away the 1/2″ strip along the left edge of this section; starting from the top and ending at the score line
- This will meet the cut that you made in step 2
- Fold and score to create the 3 panels
- Stamp the greetings for the inside layers and birds on the front DSP
- Adhere the DSP papers to the sections and add the matted greetings
- That’s it – you’re done!!!
- Cut away the upper left 4 1/4″ x 5 1/2″ quadrant of the paper
![Basic White 8 1/2" X 11" Cardstock [ 166780 ]](https://assets1.tamsnetwork.com/images/EC042017NF/166780s.jpg "Basic White 8 1/2\" X 11\" Cardstock [ 166780 ]") |
![Everyday Arches Photopolymer Stamp Set (English) [ 164623 ]](https://assets1.tamsnetwork.com/images/EC042017NF/164623s.jpg "Everyday Arches Photopolymer Stamp Set (English) [ 164623 ]")
![Splendid Autumn 6" X 6" (15.2 X 15.2 Cm) Designer Series Paper [ 164173 ]](https://assets1.tamsnetwork.com/images/EC042017NF/164173s.jpg "Splendid Autumn 6\" X 6\" (15.2 X 15.2 Cm) Designer Series Paper [ 164173 ]")
![Regals 6" X 6" (15.2 X 15.2 Cm) Designer Series Paper [ 163774 ]](https://assets1.tamsnetwork.com/images/EC042017NF/163774s.jpg "Regals 6\" X 6\" (15.2 X 15.2 Cm) Designer Series Paper [ 163774 ]")
![Mossy Meadow 8-1/2" X 11" Cardstock [ 133676 ]](https://assets1.tamsnetwork.com/images/EC042017NF/133676s.jpg "Mossy Meadow 8-1/2\" X 11\" Cardstock [ 133676 ]")
![Secret Sea Classic Stampin' Pad [ 165285 ]](https://assets1.tamsnetwork.com/images/EC042017NF/165285s.jpg "Secret Sea Classic Stampin' Pad [ 165285 ]")


