 It's invaluable!
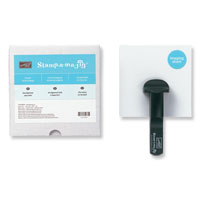
I thought that it would be helpful to post the occasional review of products that we sell, and decided to start with one that I just can't live without. Anyone who has attended any of my classes can attest that I use the Stamp-A-Ma-Jig (SAMJ for short) all the time! I will admit that this tool can be tricky to figure out; it is a multi-step process to finally get your image stamped where you want it on your project. But, it is totally worth it to me to get a phrase centered or straight, or to align the second image in a two-step stamping combo.
Here are the steps for using this tool:
- Place the corner of the plastic imaging sheet so it is hugged into a corner of the T-square.
- Ink your stamp (with non-permanent ink) and stamp the image onto the imaging sheet – again hugging the stamp into the same corner of the T-square.
- Now place your imaging sheet over your project, so you can see the stamped image where you want it to end up on the project.
- Place the T-square so it is hugging the same corner of the imaging sheet. It should overlap some of the project material so it will stay in place. If the material is too small, use a tiny titch of adhesive to keep it from moving around on you.
- Once you have the T-square in place, remove the imaging sheet; making sure that the T-square doesn't move.
- Ink your stamp again and stamp on your project – hugging the same corner of the stamp into the corner of the T-square.
- Voila!!! You should have your stamped image in the spot that you wanted.
I love this tool for many reasons, but chief among them are: it is quite inexpensive, I have better control of my stamp placement, and most importantly… it will never wear out! Even if something happens to the imaging sheet, you can substitute vellum or window sheet material to create a new imaging sheet. You can check out (and purchase) the SAMJ in my online store here.


