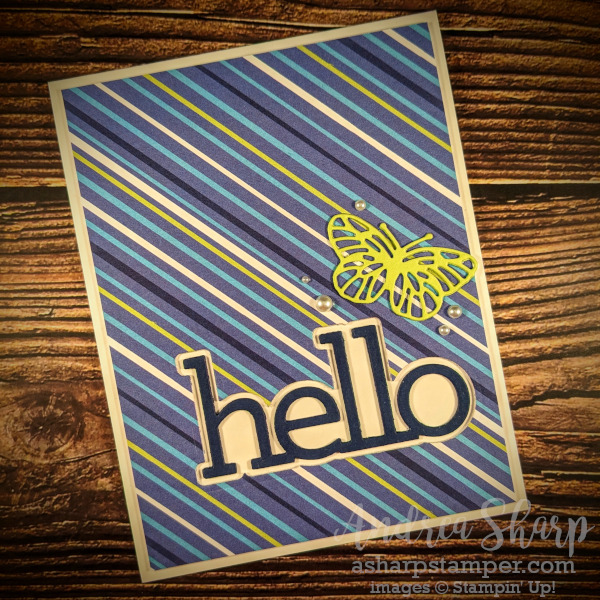
Today I’m posting a card duo so I can share a frugal tip with you. 😊 First a confession… the greeting diecut that you see here is not from Stampin’ Up! I recently shopped on another paper crafting site and purchased a couple greeting dies that caught my eye. I loved the bold, typographic look to this set and the general-use word is perfect for sending ‘just because’ cards. Don’t worry – I’m still very much a Stampin’ Up! gal, I’ve just been branching out a little bit lately to extend my dies with different styles and types. Stampin’ Up! has some great word dies that you can use for this same technique.
For this card I adhered the patterned paper layer to Basic White cardstock and diecut the shadow die from the greeting. Then I did the same thing with 2 more pieces of Basic White, and here’s how I got the diecuts to line up:
- Lay the diecut layer with the opening over the Basic White cardstock, lining up the corners
- Put some re-positionable glue on the shadow diecut and put it into the opening so the paper looks like it did before you diecut
- Press the diecut shadow so it sticks to the Basic White cardstock and remove the paper with the shadow opening
- Put the shadow die around the diecut on the Basic White, use low-tack tape to hold it in place
- Run through your diecut machine
- If the diecut doesn’t fully cut through, you can remove the shadow diecut and put the shadow die back down; the dents made from the previous pass will help you align the diecut
- Repeat these steps with a second piece of Basic White
- Set aside the patterned paper shadow diecut; you’ll use that on another card (for the no-waste 2nd card)
- Glue together the two Basic White pieces, focusing on aligning the shadow opening
- Then glue the patterned paper sandwich to the Basic White pieces, again focusing on aligning the shadow opening
- Don’t sweat if the 4 corners aren’t perfectly matched; use your paper cutter to trim the edges and square it up
- Attach to a Basic White Thick card base
- Now build up 4 layers of the greeting diecut, gluing the layers together and aligning as you go
- Attach to the card base in the center of the shadow opening
- Add any additional diecuts and embellishments to finish the card; I used a pretty butterfly and pearls to zhuzh it up 😊

This is the second card that I created using the same diecut. You’ll see the shadow layer from the first card and a stacked layer of Basic White words that complete the greeting. This card went together super-quick since I had done one step on the previous card and this design is pretty simple. I did use a different brand of cover-plate die for the background but the rest is all Stampin’ Up! The patterned paper guided me to the color choices and the stars from the Give it a Whirl dies were just the perfect embellishment for a card that I can send to anyone. I did use some Wink of Stella to make the stars pop a little more. Sadly Wink just doesn’t photograph well, so you’ll have to take my word for it that the stars sparkle beautifully. The largest Night of Navy star gives a wee hint in the photo of some glimmer.
So there you have it! I hope you’ll give it a try with a word die that has a coordinating shadow. It’s really fun to think about how to extend your paper and diecuts to create a second card.
Product List


