 This is one of the cards that I created for the multi-demonstrator Stamp-A-Stack that I participated in back in October. Because that event is open to people of all different skill levels, I try to have one card that is pretty simple to create and a second one that features a technique that is a bit more involved (but still not crazy complicated). This card is the more involved technique one.
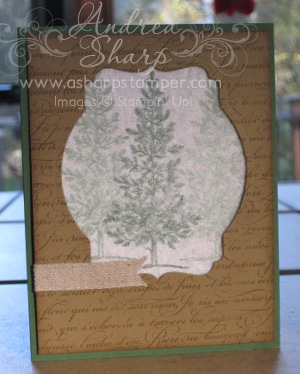
The picture doesn't show it at all, but the window with the stamped trees is all glittery and snowy looking. That panel is decorated using the dryer sheet technique which creates a gorgeous snow storm effect. I learned the technique several years ago, but what is old becomes new again and several of the event attendees had never done this before and were really excited to learn it.
You can give the dryer sheet technique a try, here's how:
- Stamp the images that you want on the panel. On this example the trees are stamped using repitition (the middle tree is stamped first and a side tree is stamped immediately without inking. I inked up the stamp again, and stamped it off on scrap paper before stamping the other side tree).
- Put adhesive over the entire front of the stamped cardstock. The multi-purpose adhesive sheets are perfect for this! Peel off the backing so that the adhesive is exposed.
- Lay a used dryer sheet over the adhesive and smooth it out with your fingers. You want to make sure that the dryer sheet is stuck well to the stamped cardstock.
- Sprinkle glitter over the dryer sheet and shake off the excess. The crevices in the dryer sheet along with the sticker adhesive will make the glitter stick to it very nicely.
- Use your snowy panel to create your final project.
I used the following materials to make this card:
- Stamps: Lovely as a Tree, En Français
- Cardstock: Garden Green, Baked Brown Sugar, Whisper White
- Ink: Garden Green, Baked Brown Sugar
- Accessories: Deco Labels Framelits, Multipurpose Adhesive Sheets, Dazzling Diamonds, 7/16" trim


