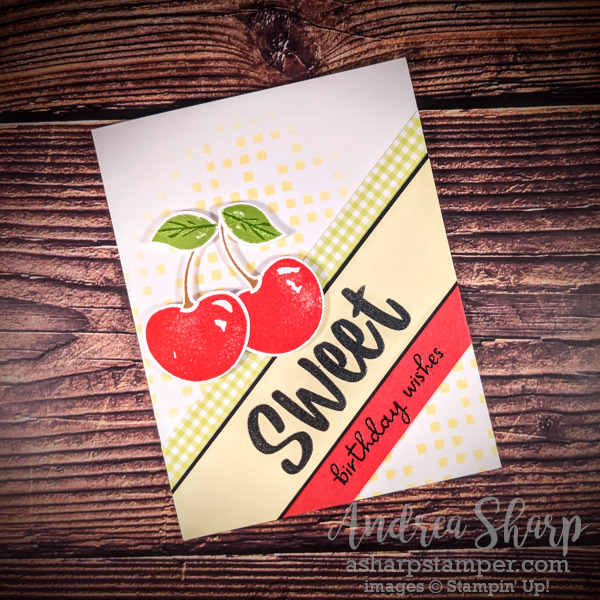
Back in June I made a large batch of cards for our church birthday card ministry. I had my fingers crossed that there would be enough to cover August as well, but I found out on Monday that a few more were needed. So, I put my design cap on and came up with this card and made 8 of them. There are a few elements on this card that make it less than great for mass production, but it was totally manageable for the number that I needed. Stamping and punching the parts of the cherries takes a smidge of time but they are so cute I couldn’t resist. I used one of the Foursquare Decorative Masks (what the rest of the world calls stencils) and applied Lemon Lolly ink using a Blending Brush to create a funky highlight in the background. It didn’t take long, but it was one more step in the process. I really like how that part turned out!
One thing that I want to describe in more detail is what I did with the stamped words. It isn’t hard, but it is a great option to add some texture and shine to your card. This works best with a stamp positioner tool like the retired Stamparatus 😭. First I stamped the greeting with Tuxedo Black ink and cleaned the stamp. Then I made sure that the cardstock didn’t shift and then stamped with Versamark ink. Then I added clear embossing powder and melted with the heat tool. You might be wondering why I didn’t use black embossing powder. It makes sense, and it’s one less step in the process. And that’s how I started at first. But… I found that there was some dust from the black embossing powder that stayed on the Lemon Lolly paper. It wasn’t as obvious on the Sweet Sorbet strip, but the Lemon Lolly is so light it stood out. So I used this technique so that I wouldn’t have that problem on the light cardstock. The great thing about this technique is that it allows you to have an embossed image in any color, which is super cool!
Product List


